Thursday, 30 June 2011

Card-Making on the Cheap - Glittered Brads

Hi Guys,
As I'm sure you know if you're a card-maker, sewer or crafter, it can be quite an expensive hobby! ;)

es·pe·cial·ly... 

Card-making! Patterned and plain Papers, Card Blanks, Envelopes, Stamps, Inks, Glitter, Glues and other Adhesives, Extras such as Divine twine or yarn, ribbons, buttttons, and the wide, varied, oh-so-expensive range of sticker embellishments! And that's not even including tools such as craft knifes, bone folders, eyelets and eyelet setters,  Alphabet and outline stickers... We could be here quite some time! ;)


It really adds up, doesn't it? Which is why I am going to share with you as many tips as I can for making those beautiful handmade cards on the cheap! I can't promise how regular it will be, but I'll do my best!

My first little tip is one you may know, but for those of you who don't, I'll fill you in. It's a great little trick for making your own brad embellishments for next to nothing, instead of buying those super-expensive ones in a craft shop! I mean, just look at these "American Crafts" Glittered brads on Amazon. $5.81 plus shipping for only 4 different colours! No Thank You! Here's how to make your OWN:

      You will need:

  • A Pack of Plain Brads or Paper Fasteners.You can buy these in any office supplies store for really cheap, but chances are you already have a pack!  

    Some PVA Glue

    Glitter (whatever colour you like, you probably have a few packs!)

    Scrap piece of card (not pictured, whoops!)

    (Tissue is optional, I created a mess a glitter and glue explosion while doing this)

    1. Squirt a dollop of Glue onto your scrap of card. 

    2. Take a Brad. Dunk your poor, helpless brad headfirst into the sticky sea. This will apply an even covering of Glue onto the top of the brad. Not too much, or it'll all slide off and die, not too little or the glitter won't stick. (It really is simple, I'm just making it seem really complicated so this sounds like an actual tutorial and not something you can do with your eyes shut.)

    3. Next, dunk your gluey brad in a pot of glitter. You can sprinkle glitter over it instead, but this is wayyy more satisfying! 

    4. Stick your brad into a ball of Blue-Tack to keep it upright during the drying process.

    And that's it! Homemade glitter brads you can use for Cards, Scrapbooking, Gift-Tags.. whatever you want! Told you it was easy! 

    *WARNING* You will soon become addicted, make hundreds of them in every single colour of glitter you own, go to the shops, buy a cardmaking magazine that has free glitters with it, and make more. Or is that just me?! ;) 

    Here thay are all lined up! Aren't they pretty?! I took a ridiculous amount of photos of these, but they take so long to upload to my computer I'll just finish with this >> cute card I made using the glittered brads. See, they're the owl's eyes! :) This was a project in a Papercraft Inspirations mag that I modified and added glittered brads too!

    Have you made these before or do you have any other "Cardmaking on the Cheap" tips? Leave a comment below and I'll get back to you! S xx


Wednesday, 29 June 2011

Winnie's Wool Wagon and Woolly Projects!

Hello!
I was out and about yesterday, and we drove past a cute little shop, calling itself a "craft café." Of course I simply had to go in! :) The "cute little shop" turned out to be "Winnie's", an adorable wool shop with a little cafe at the back. If you're a knitter living in or near Dublin, I highly recommend you check it out. I've never seen so many different types of yarn and wool in my life! They specialise in materials for Knitting, Crocheting and Beading, and also run classes, knitting groups and courses, so if you don't know how to knit, you can learn how to! And even if you have no interest in craft whatsoever (What are you doing reading my blog then?! :D ) the café is well worth a visit! I recommend the Bakewell Tart ;) but they serve breakfast, lunch and a variety of sticky buns and cakes!
Of course I couldn't leave without buying a little something, and I noticed they sold  little "Dollymix" balls of wool for a euro each. My Mum had bought me a couple of them while ago, so I decided to add to my collection, and bought a pretty lavender colour!

There are actually so many things you can use wool or yarn for, even if you don't knit!
  • Pom-poms (which you can then transform into Pom-pom flowers), 
  • Yarn-wrapped frames (I make these out of cardboard!)  
  • Yarn-wrapped letters
  • Garlands (String felt or fabric shapes on or make this!) 
  • "Clotheslines" for hanging cards and drawings (Just add Blue-tack and mini clothespins!) 
  • Finger-weaving (!)  
  • Word decorations (There must be a better name for these but my brain is not working today! ;) 
  • Yarn-wrapped sticks and twigs
  • Mini yarn balls that you can then turn into Yarn Ball Lights 
  • BIG Yarn Balls you can use as chandeliers/lights or as decorations for a wedding or big party! I think these would look best with white or neutral-coloured yarn. You can use hemp or string for these as well, if you don't have any yarn! Pretty inspiration here.
  • Cute cardboard snowflakes!
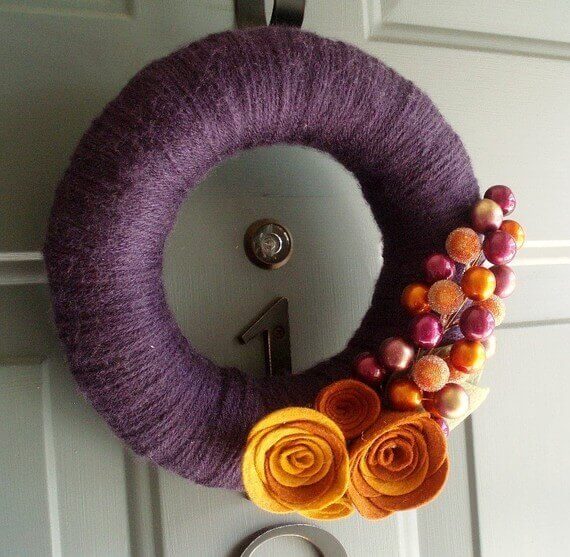
  • Yarn wreathes!. There are SO many tutorials for this one, and so many gorgeous variations. I like this tutorial and this cute variation! They were a bit of a craze in the craft world for a while, and are absolutely fab! They look great, are really easy to make and are completely personalize-able (Is that a word?! Spellcheck seems to think so!) You can add buttons, bows, fabric and felt rosettes and flowers, your initials, or make holiday versions with fabric shamrocks, hearts, bats or Christmas trees! Haha! If you need MORE inspiration, have a look at these! (I couldn't remember where I'd seen the braided one, This link reminded me it was at Homework! Isn't it just beautiful?!)  
  • If you really need MORE ideas ;) check out this link!        
  • If you can find any more yarn/wool projects I haven't featured or have any comments at all, leave a message below! I do read all of them and they make my day! S xx 
     Proving that purple and orange CAN work together!

Saturday, 25 June 2011

Felt Flower Pillow!

Hi guys!
So I've wanted to do a Felt Flower Pillow for AGES! I'd seen them everywhere, in all kinds of different colours and styles, in shops and on crafty blogs, but had never attempted one. My main excuse reason? I didn't have a Glue Gun or Fabric Glue. But now.... I do! <Remember that post? ;) > So... I decided to attempt one! It came down to these two tutorials which I loved. This one from H for Handmade and this one from The Crafting Chicks. In the end I made the H for Handmade one, but I'll probably make the other one sometime in the future! :)  I kind of winged when I actually made it, to be honest! I changed some measurements and things like that, but I'm SUPER pleased with how it turned out! I do recommend that you go over to H for Handmade and check out Amy's tutorial! Unfortunately, when I uploaded the photos from my camera to my computer, I didn't include one of the finished pillow. The one below is just pinned down. :/ (Tip: Remove pins before doing your next layer of petals so you don't hot glue a pin into your cushion. I know, it happened to me!) The finished pillow looks like this (minus the pins) on a purple gingham background. Hopefully I'll get around to uploading that pic soon! Oh, and apologies for the terrible picture quality. My photography skills are non-existent leave something to be desired!

I leave you with this >> awesomeness I found via Pinterest. It's a seat made from magazines and a cushion! Cool or what?! S xx

Thursday, 23 June 2011

Summer Fun for Kids! :)

Hey guys! So, it's (finally) Summer, the sun is occasionally making an appearance, which is good enough for me, and over here in Ireland kids will soon be out of school! (My younger brothers get their holidays in just over a week.) So if you have kids, (or are a kid :D) here are some ideas and crafts to keep you busy for the next 2 months! Parents, no need to thank me! ;)
  1. Go for a walk on the beach and collect some stones, pebbles  Then... 
  • Paint them like these and have a game of dominoes!
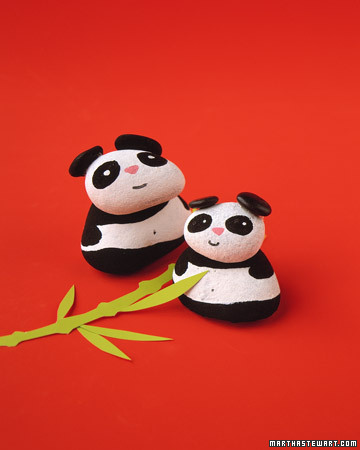
  • Paint little faces, spots and stripes on them, glue on some pipecleaners, and create ladybugs, bees, whatever you want! How cute are these pandas?!
  •  Make yourself some sock rocks! Follow this easy tutorial to make a whole pile of 'em using old socks!
  • Find a nice big rock? Use it to make an adorable Bunny Bookend or paperweight!
  • And if you really want to go all out, have a look at these painted rocks for inspiration!
     2. If you're one of those "educational fun" parents ;)
  • Try these Pasta Skeletons! The kids will have loads of fun raiding the kitchen, picking out the pasta, making a mess, and glueing them down - But hey! they'll be learning the bones! ;)
  • Encourage them to read some books by making them this Bookworm Game from Martha Stewart!
  • Storing, collecting and learning about stamps and the countries they came from will keep your kids fascinated for hours!
  • Have a bit of fun playing aroung with these bouys and teach your child how they stand up in rocky seas! You can make boats and ships out of nearly anything! Newspaper, walnut shells filled with wax, or even coffee can lids!
     3. Make some fun toys and games that you can then play with for the rest of the summer!
  • Puppets are always a favourite - make origami ones, paper bag ones, or the original, sock puppets! :) And don't stop there! Make a paper or felt puppet theatre to perform shows in! Hours of entertainment!
  • This Sponge Ball is a great toy! Make a few, and then on a hot summer day (if there are any this Summer! *sigh*) let lose, and have a big water fight, with balloons, guns and these!
  • For the budding astranaut! Cardboard Space ships!
  • If you're willing to put a bit of time and effort into your/ your kid's summer, make them one of these Play Ovens! They will love you forever! ;)
      4. Encourage your kids to save their pocket money over the       Summer by helping them to make one of these sweet Piggy Bottle Banks!  

For more ideas, check out these two slideshows:
What's that?! You want even MORE? Well, OK then...
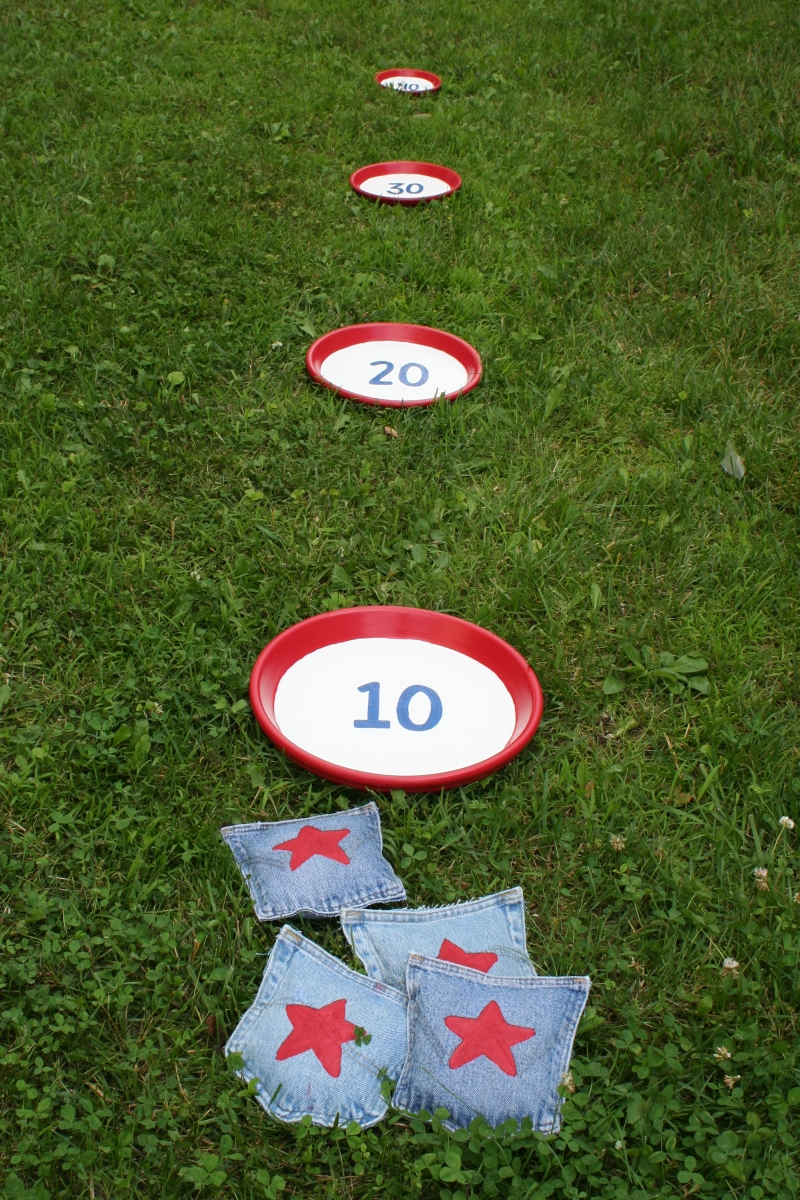
  • Make this awesome beanbag toss game. Do it on its own, or entertain your kids for HOURS by setting up an obstacle course/mini olympics in your back garden!
  • Boys (and monster/robot-loving girls!) will adore this papercraft project!
  • Make some DIY Moon Sand! MUCH cheaper than the real thing, and a whole lot funner, as the kids get to help mix in the "gloop" stage! ;)
  • Kids love comic books, right?! <Bear with me here. If your kid doesn't, go make the moon sand! :) > Get them to write their own using these FREE (the catchphrase had to appear somewhere!) printables!
  • If you and your kid/s want to do a LARGE scale project, this is for you! You use a hula hoop as a giant loom to make a rug. This is possibly the coolest thing I have seen. Ever. there are a number of reasons why. A) You are re-cycling old T-shirts, which is good for the enviroment. Yay! B) The hula hoop and T-shirts are so colourful and this just looks like it would be so much fun! C) At the end, your kid has a fab, handmade rug to put in their room! D) You'll probably have the supplies, so it's FREE!! :D Go check it out (if you haven't already!) here!
  • Here's a bunch of Bubble-wrap activities for younger kids. If you have recently moved house, and have piles of bubble wrap lying aroung the house, this is for you! Oh! And if you have big boxes as well, make the oven featured above! :)
  • Why not print out this calendar, fill it with the projects and crafts mentioned here, and every time your kid comes near you saying "I'm boreddd!" just hand them the calendar! I guarantee your kid will never be bored again!*
*Well actually, they may be, but its not very likely! ;)


  • OK, how insanely amazing is this 101 Bits of Summer printable? Very, I tell you! The ideas, the colours, the layout, everything about this screams Summer and makes me want to get started doing it all!
  • For younger kids, this picture activity board is great. Print out the little pics here.
  • Here's a very long list (100 things, in fact, which is a lot more than I managed!) of things to do with kids during the Summer. There's some fantastic ideas in there, and best of all - she's speakin' my language! ;) It's all FREE!! ;D
  • And just when you thought I couldn't possibly find any more Summer to-do lists, I did! This DIY is really good, as you can wipe off your ideas when you're finished them, or if you want to re-use the board for next year!
  • If you're still awake ;) (This was a very long post!) and you still want more things to do, here is a free printable with over 70 summer activities, with instructions, charts and calendars. AND it's colour-coded. Grab it here.
      Thought you weren't ready for summer with the kids? You are now! S xx    
Monday, 20 June 2011

Adore Home Magazine!

Hello!
How was your weekend (and your Father's Day)? Good, I hope. :) Here is the secret gift I mentioned! You can use it next year! (Hint hint!) It's a printable Coca Cola can sleeve! It's really funny, cute, and EASY! You just print it off, trim it, wrap round your can of Coke and secure with double-sided tape! My Dad really likes Coke, so I thought t would be a nice gift! Grab one here!

I've just been featuring "craft stuff" lately (Not very descriptive I know, but I can't really think of another word!) so I decided I'd take a break and tell you about Adore Home. It's an Austrailian online home magazine. If you're re-decorating your home, or love interior design. This is for you. The really great thing about it is that because it's online, there are direct links to the websites and blogs featured. You can click on them, and they'll open in a new tab, ready for you to explore once you're finished reading the magazine!  And ... oh yes, it's the catchphrase! - It's FREE! No more buying those expensive mags for me! :)  Go here and then click on "read!"


The bright, colourful, stylish interiors are really inspiring! :) Check out the blog for the magazine here! There are tonnes of online magazines out there. Any to recommend?! S xx

Friday, 17 June 2011

Comments and DIY Mirrors!

Wow! 100 hits! (Well, a hundred and three, but who's counting?!) I'd just like to say Thank You to you (yes, YOU!) for visiting my blog over the last month or so. I hope you've enjoyed reading it, although I don't know if you did or not, as there are no comments! ;) Don't worry, I won't bite, just leave a comment saying anything you want! You could:
  • Tell me about your blog, and recommend that I visit it (I will!)
  • Tell me about a cool craft or DIY project you found or created,
  • Recommend a craft/design/home website you love and tell me why,
  •  Show off! Attach pictures or link to a blog post where you created some amazing cards, crafts, redecorated your bedroom, anything! I'd love to see what you're up to!
  • Ask for something particular on the blog! Maybe you'd like to have more "masterclasses" (like the cards one), more home projects, handmade gifts, cool websites, freebie downloads, or something entirely different! I'll take all suggestions and do my best to cover them!
  • Ask for advice on a project. Maybe you have a card/lamp/knitting project/whatever that isn't working for you? Ask me for some advice and I'll do my best to help you out! (Although, I'm not a really experienced crafter, and may not will not! be able to turn your project into a complete masterpiece!
  • Give me a compliment! ;) Something you love about the blog? Tell me and watch me faint me joy (Well, imagine it, as you're not actually able to see me!) Or if you have a complaint or something you feel is wrong with the blog, tell me too. I'll do my best to fix it!
  • Just say hi! It's not that hard! ;)
On a side note, I found two fantastic projects to pretty up an old mirror via Pinterest today. I found this one (on the right!) at first, and then clicked on to what it looked like before and found this one! I've been trying to make the large mirror on my wardrobe door look better for ages, and now I can't decide which of these to do! Help? :) S xx

Thursday, 16 June 2011

The Graphics Fairy

Well, I wanted to keep this a secret, but because practically every crafter out there already knows anyway I'm such a nice person, I decided to let yoou in on it! ;) "It" is a fantastic website, called The Graphics Fairy, full of FREE (have you noticed? That's like my catchphrase!) clip art images and vintage printables to use for craft projetcs, collage , DIY, scrapbooking... anything you like! I discovered it all of ten minutes ago, and I think I am going to break my printer with the amount of stuff I want to print out and use. I'll have to restrain myself! :) So what are you waiting for!?! Go now, Thank me later! ;)

Monday, 13 June 2011

Father's Day Part II

As promised, Part two of my Father's Day Round-up! If you have a request (more printables, gift boxes, cards, actual gifts, etc.) leave a comment below and I'll do my best to help you out!

  •  Martha Stewart  really is the Queen of crafts for Birthdays, Christmas, Mother's day.. and yes, Father's Day! :) So here are a just a few of the projects from her website! 
  1. Father's Day Car Wash Kit. A "subtle" hint to the Dad who has a very dirty car! ;) But really, this is a useful gift that also looks really nice when packaged up in a metal bucket with a cute tag. And of course, you could also offer to help him wash the car!
  2. Here's an adorable Cutout frame that would look really sweet on your dad's desk! Fill it with pictures of his children or grandchildren or even images of his favourite hobbies!
  3. Coupon Booklet. I know I featured another coupon booklet yesterday, but you can never have too many, right?! And besides, this one is really cute! ;)
  4. These Map Coasters are a fantastic idea! Showcase your Dad's favourite holiday spot or childhood home, while also giving him a place to put his drink when working at the computer, watching TV, etc. 
  5. I'm thinking of making this Wine-Label Album Kit for my Dad, but I think he's more interested in actually drinking expensive wine than documenting the labels! It's a nice gift though, especially if you include a bottle of wine!
  6. This slideshow has a bunch of card ideas. I love the jacket one, and these awesome "cuffs!" Very smart!
  7. And last but definitely not least, this Retro Button Card! I made this for Father's day last year and I think my Dad liked it! ;) It's a great card all on it's own, with it's seaside, post-card-style (if that's a word!) image, but the fun part is customising it! You can add your own buttons or other embellishments, and write a lovely greeting in the space at the bottom! There's a Mother's Day one too, if you happen to become addicted to these cards! ;)

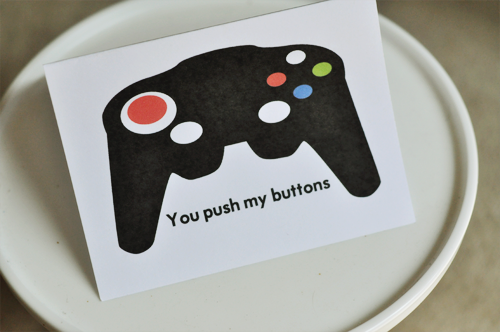
  •  Here's one for the gamer/video-game loving Dad! (I'd say there's a few!) It's a simple bold design, with a strong image and a funny little sentiment. And... it's free! Yup, hop over here to 30 Handmade Days to nab it! 
  • Here's a vintage Father's Day stationary pack - free! - from Funkytime -  fantastic website by the way! Download it here, and while your there, check out the DIY section!                                                                             
  • This is a fantastic printable gift for the techy Dad - an iDad! It's way cheaper than it's father, the iPad, in fact - it's FREE! Get over to seven thirty three now and download it! :)  And if you look closely in the top left-hand corner.. it even says "iDad!"  So cute! :D     
  • But that's not all from this fab blog -oh no! Look what she made last year - a genius "Google" card! You Google "World's Best Dad" and what comes up? Why your dad, of course! And if Google says it, it must be true! ;) I love this!

  • Here's another kid's project from Kaboose. It's a  trophy for your Dad - for any reason you like! And it's made out of... paper cups! Go, give it a try. He deserves recognition! ;) I'm sure any Dad would proudly display this on his desk!
  • It's really worth your while to download this free eBook with tonnes of handmade gift ideas for Father's Day! I had a browse through and there are some great ideas, from Keychains to Photo frames, Back Scratchers (!) to Spice Rubs, for the culinary Dad. I would make these for my Dad, but he's already one step ahead of me! He has made his own range of spices and printed off cool labels for them as well! (Thanks Dad! ;P) He really doesn't make it easy to make gifts for him!    

  • I've discovered that my Dad has been reading my blog (unfortunately!) and so none of my gifts will be a secret! :( So I have one more trick up my sleeve that I will not be revealing until after Father's Day! Hopefully my Dad will like it. It's simple, but suited to his personality ;) Sorry, this one's a secret!

  • My computer's messing up, but I want to get this post up, so if you're looking for more ideas for gifts (I hope I've covered printables and cards) check out these two slideshows from BHG!
  • Father's Day Crafts for Kids & Handmade Gifts for Father's Day. Failing everything, write him a note, give him a hug and tell him how much he means to you. that's worth more than 30 ties!
                                                                                                                                                                                                           

Sunday, 12 June 2011

Father's Day Part I

I decided I'd do a DIY Father's Day round-up, seeing as the day is drawing closer and I seem to have done nothing!! (oops!) Hopefully there are others in my position ;) so grap a glue stick, some paper and your laptop and lets's get cracking!

  • I will be making this cute gift box for my Dad  None of the projects I'm featuring will I be giving to you Dad, if you're reading! (Aaaghgghh! Really hope he doesn't!) Anyway, this a cute message box from Just Something I Made. It would be great for the nostaligic or fisherman Dad! Cathe suggests you fill it with loving notes, photos, trinkets and momentos. A gorgeous gift, I'm sure you'll agree, and a FREE printable from her site! Yay Cathe! Get over there now, and while you're there, check out the other amazing printables and projetcs she has!

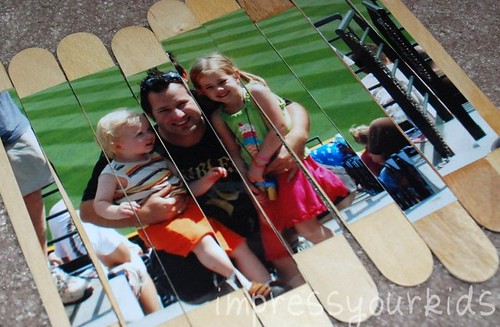
  • Super-easy (and cute!) Jigsaw puzzle craft from "Impress Your Kids". I don't have kids (obviously!) but if you do, this would be a great gift to make with them! They can provide the lollipop sticks by eating some popsicles. This can be used to bribe them to to help you by holding the sticks, sellotaping them, etc. Fun, quick and classic.


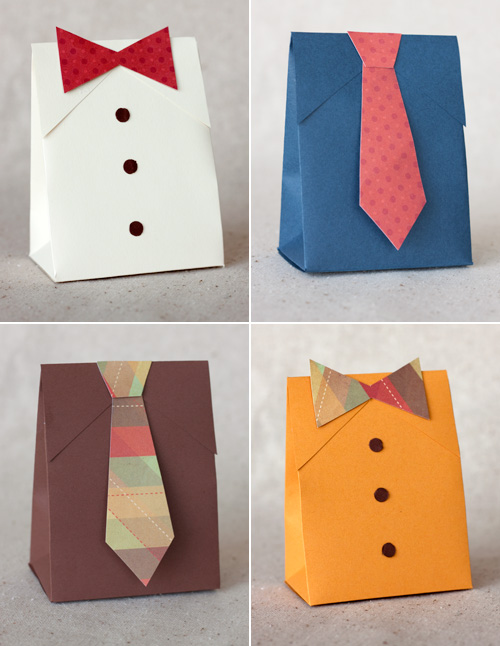
  •  Shirt and Tie Gift Boxes. Thes are great for the working da who also appreciates the smaller things in life, such as giftcards, luxury chocolates, iPods, watches..! Just a selection of things you could pop inside! These seem easy enough to make, and there's a free template to help you. then you can customise to your heart's content, adding buttons, bow ties, whatever! 


  • This fantastic Father's Day Tool Box is something any Dad would treasure, and is available as a free downloadable kit, so you can print out new papers if some mysteriously go kissing over the years! Scroll down until you see the picture opposite and then download to your heart's content!


  • There's an awesome collection of Father's Day cards, gift boxes and papercraft at Canon. They're all FREE and you candownload as many as you want! Everyone together: "THANK YOU CANON!!" I want to print it ALL off,  it's so cute! (and free!) *sigh* 


  • If you want something a bit less "manufactured" and something that actually requires creative thought ;) I think it would be cute to print off this Retro Father's Day Clip-art  from Just Something I Made (again!) and make your own little card, giftbox, scrapbook page, garland(?) or booklet. You can get your kids (if you have kids!) to get in on the act and colour them in and make cards too! If you make something with this or have other ideas, i'd love to hear from you! leave a coment below! ;)


  • If your dad's a foodie (like mine!) buy some of his favourite sauce, pickles, wine, whatever! And stick some of these Labels from Martha Stewart on them! Better still, make him some home-made goodies straight from your kitchen and package them up! I found some other food labels here, at Oh Happy Day (fab blog, check it out!) I love the way these are called "Super Hero Supply!" They're so cool!


  •  I think these Faux Vintage Ads for things like Facebook and Twitter will make my Dad chuckle! If your's is up-to-date (or not very up-to-date!) on technology, these are perfect. I'm thinking of creative ways to turn them into a gift - maybe using one as the cover for a notebook that he can use to jot things down, or turning them into postcards and writing a sweet message on them! Any ideas? Leave a comment!


  • Again, if you have kids, this is a great project! A little worksheet for them to fill out while you make breakfast -in-bed (of course!) Kids always seem to come up with priceless answers to anything you ask them, and you can use it as abit of a "How well do you really know daddy quiz! The pdf is here, but make sure to visit the link above for some priceless answers (My dad has some grey hair, My dad likes to wear his swimming suit. Funny!) 


  •  Cute printable art from The Holiday Snob! I love the "Dad's sayings" one -guaranteed a laugh! You could frame these and give to Dad for his office, or make into a card Dad will love! :)


  • If you're not in a paper-crafting mood (cue gasp from me!) then cook him up his favourite meal - gormet, three courses, the works and Fold a Napkin Shirt for his plate. Sure, he might not even notice it and just shake it out so he can dig into his food, but hey! It looks nice! ;)  


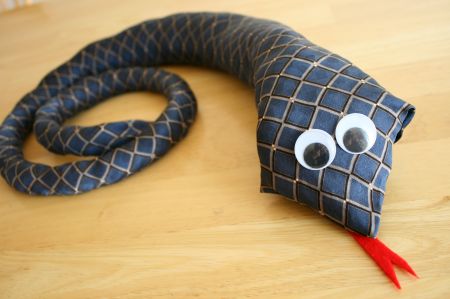
  • If you'd prefer to actually craft something for your Dad, make him this charming Tie-Snake! Just make sure you don't start hot-glueing his prized Italian linen tie without him knowing! Use an old one or get one from a charity shop! 


  • Continueing the tie idea, why not make him this Neck Tie Wreath (Slide Two)Good luck, you'll need a LOT of ties! ;) But it's a cute gift that would look great hanging on his "study"/ leave-me-alone-I'm-busy room door! 


  • And, if you have NO time whatsoever, this coupon booklet is perfect. It's cute, obviously, but it requires basically no effort (It's one for the lazy crafter!) Just Print, Cut and Staple. That's it! Then it's done, and you have a gift for your dad! ;) One to bookmark!  Of course, then you'll have to follow up on your promises and actually DO the work specified, but hey, that's another day! Am I right?! ;)


  •  To decorate your sitting room, kitchen or wherever you will present you dad with gifts, make this cute Tie Banner. It make take a while to cut out the pieces, but with a little looking after, you can use it year after year! 


  • Another project you can make with kids is this Paperweight! It's funny, pretty simple, and you probably have everything needed to make it at home!


Will you be making any of these? I'll be back tomorrow (hopefully!) to share some more ideas. If you have any projects you'd like to share, leave a comment below! S xx

Friday, 10 June 2011

Glue Gun!

Aaaahhhh! Sorry, that's probably not the best way to start a post, but I finally got a glue gun! Now, if you're an experienced crafter, you'll probably be laughing behind your hand at me, kinda like this guy here,

But for me this is like buying a car! I will now be able to do about a billion and two (give or take!) craft projects that were simply un-do-able without a gun and I am SO excited!! If you are an un-experienced crafter (like me!) or simply have no idea what I'm talking about, a hot glue gun is basically a gun-shaped piece of plastic with a nozzle and trigger that you pull to release glue that is hot enough to blister skin (!) You load it up with a glue stick and then you're ready to start your project! I know I am making it sound like a torture weapon and I'm not very good at explaining things, but they are really useful for all kinds of crafts and more heavy-duty DIY stuff (Don't you just LOVE how specific I am?!) Anyway, my gun, if you're interested is a Stanley Dual Melt Glue Gun, which basically means it's reliable, and can also be used on a cooler, safer setting, which I think I'll be using until I get used to handling one. If you're planning on buying a glue gun, make sure to buy glue sticks that work with your gun, or it'll be useless!!! (Thanks to my Mum for ordering one for me! :D ) 

Some projects I'm planning on making:
  • Felt Flower Pillow. I love this and have had it bookmarked for ages. Now I've got a glue gun I can make it!
  • No-Sew Flowers from MADE. These are just gorgeous! I think I'll make about 30!
  • Felt Pom Pom Thingamabobs! These are really cute and could be used to decorate whatever you want!
  • Fabric Flower Rings. These would make beautiful little gifts for Mother's Day, Birthdays, and Christmas!
  • Scrap Paper Garland. A great way to use up scrap paper and brighten up your bedroom or craft space (same thing if you're me!)
And tonnes more!! What will you be doing this weekend? Any crafty projects you'd like to share? Are you inspired to make some cards after my post yesterday?! ;) Leave a comment below! S xx

Thursday, 9 June 2011

Making Cards!

Hi! Today I'm going to tell you a little bit about how I make my hand-made cards, what resources I use, and give you a few tips on making your own! Think of it as a little "card-making-masterclass!" Here we go:

  • First of all, the most important thing you have think about is the occasion of the card! Is it a big milestone birthday, a new house or baby? Maybe even a glamorous wedding! Usually it's just a normal birthday, so I can go right on to the next steps, but if, for example, someone is 50, you'll want to make that loud and clear on the card! (Card below from The Making Spot, a cute blog! )

  •  Second, I think about WHO I'm sending the card to... a little girl or a grown man?! The cards need to be appropriate to the person who's receiving them! You can also take this step further, by adding personal details and images to create a card that will be treasured! Think about who is receiving the card. Do they like fishing or football, dresses or dogs?! What are their favourite colours, flowers, sports, hobbies, TV shows..?! The list goes on and on! Add some of these to your card to make it truly personal! If you do not know the person that well, or are unsure as to what they would like, move on to the next step. ( The card below is from Papercraft Inspirations, and would be perfect for someone who loves sewing! Plus, the sewing machine image is a free download form their site! : D )


  •  Draw out a rough sketch of your card. You can skip this step if you want, but I find it helps you with the layout and placement of embellishments on your card. (The sketch below is from Clear Scraps.) You can download loads of virtual sketches from cardmaking sites to help you with the laying out of your cards, or you can go old-school, and just draw out on a scrap of paper what you want your card to look like. It's a good idea to keep all of your sketches together in a folder or ring binder so you can refer back to them and reuse layouts for different occasions!


  • Next, work out a colour scheme. The easiest way to do this is to think about the occasion and recipient (Pinks and pastels for a girl's card; Blues, browns and greens for a man's, etc.) and then use patterned papers to help you. Packs of patterned paper can be bought in virtually every single craft store, or you can buy them online, and they come in EVERY SINGLE pattern, colour or texture you could ever want or need! They're a lot like fabric in that way, so if you're a sewer, and usually spend hours sighing over gorgeous fabrics, prepare to be a paper-crafter, and spend hours sighing over - yup! You guessed it! Gorgeous papers! Papers can also be quite expensive, but there are a few cheap ways to get some!
  1. Download free papers from sites like Papercraft InspirationsCardmaking and Papercraft, and Polka Doodles, and simply print them off. For most sites, you'll have to sign up, but believe me, it is SO worth it to get FREE, gorgeous papers!The only drawback with this is that you use up quite a lot of printer ink, which can be expensive. But if you need papers fast, this is a good way to go!
  2. Get cheap, plain paper and use rubber stamps and ink to jazz them up, and make your OWN paper! This means you can get really creative with different colours and designs, but you still have to buy the paper and the stamps, so maybe it's not so free! But if you already have these supplies lying around, whip than out and get making!
  3. Buy Cardmaking magazines such as Papercraft Inspirations (my personal favourite!), Cardmaking and Papercraft, or Making Cards. I've bought all of these magazines, and they have from 4 to 12 free papers included with each issue. C&P also has stamps or "dig-stamps" included as well. You can subscribe to these magazines online and have them delivered to your house every month, two months, etc., or they are available at most good newsagents. (And no, this is not sponsored, it is not an ad!!) If you can't find any of these mags, don't worry! There are LOADS of different ones, these are just the ones I buy! Again, not completely free, as you have to buy the magazine(!) but there are also tips, techniques, projects and competitions in the magazines, so they are a good investment!
  • Now go ahead! Make your card! Whaddaya mean, you need more help?! OK,OK, to make cards you can buy card blanks from art & crafts shops, or make your own with plain card. Once you've got the blanks and the papers (see above), you can go wild picking different embellishments, such as greeting and outline stickers, brads or paper-fasteners, eyelets, buttons, beads, bows and 3-D sticker embellishments... Go to any crafts shop, and you will literally be DAZZLED by the all the different things you can stick on a card! Then use these wonderful objects, together with your card sketch, and create something beautiful! And you thought it was just about writing "Happy Birthday" on the front. Didn't you? ;)      

(From Papercraft Inspirations)


  • If you have any questions (I'm not the clearest at writing instructions!) I would LOVE to help! leave a message in the comment box underneath and I'll get back to you as soon as possible! S xx

Sunday, 5 June 2011

Pompom trim!

Hi Guys, 
I bought some pom-pom trim today, just because I had heard of it a few times and thought it looked cool! But now I'm back home wondering what to do with it?! I did a quick Google and found a few tutorials of things to make with it!

  • Necklace! There's an awesome DIY necklace I could make here.
  • Pillow! There's a cute pillow tutorial here.  
  • Tablecloth! Tutorial  here.
  • Scarf! I don't have a tutorial for this one, but I think it would be quite easy to attach some trim to the bottom of a scarf!


  • Flower! This BRILLIANT idea uses pompom trim to make a gorgeous flower that can then be used as a topper for a card!
  • Lampshade!  Jazz up a boring lampshade by slappin' some trim round the bottom! Genius!
  • Card! And finally, a pretty awesome way to make a card extra special and fun? How did you guess?! Yes, its Pom-pom trim!


    Hope you've enjoyed looking at these projects. and I've inspired you to get some pom-pom trim! Which of these projects do you think I should try with mine? Do you have any other projects I haven't featured? I would LOVE to hear from you! Just leave a comment below! S xx